Xerox VersaLink C400/C405 Upper Roller: Replacement Guide and Best Practices
Understanding the Role of the Upper Roller in Xerox C400/C405 Printers
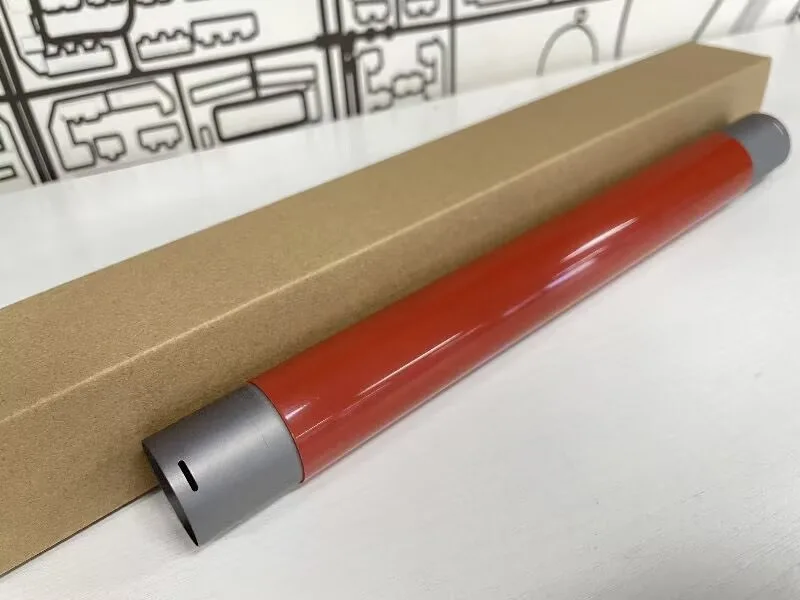
The upper roller in the Xerox VersaLink C400 and C405 is a critical component of the paper transport system. It works in tandem with the lower roller to grip and feed sheets through the print path. Over time, the rubber surface wears down or becomes glazed, leading to misfeeds, jams, or streaking on output. If you notice repeated paper jams at the registration area or uneven wear patterns on printed pages, the upper roller is likely the culprit.
Unlike some consumables that have a predictable life span, the upper roller's longevity depends on paper type, environmental conditions, and print volume. High-humidity environments accelerate rubber degradation, while rough or coated papers can cause premature wear. Regular inspection every 30,000 pages is recommended for high-volume users.
Identifying When to Replace the Upper Roller
Common symptoms of a failing upper roller include: frequent paper jams with the sheet partially fed, diagonal skewing, and visible flat spots or cracks on the roller surface. You may also hear a squeaking noise during paper pickup. If you perform a roller cleaning using isopropyl alcohol and the issues persist, replacement is necessary.
Xerox does not publish a specific yield for the upper roller, but typical replacement intervals range from 50,000 to 80,000 pages. The part number for the C400/C405 upper roller is 604K57960 (also listed as 604K57970 in some regions). Always verify compatibility with your specific model variant before ordering.
Step-by-Step Replacement Procedure
Replacing the upper roller requires no special tools and takes about 10 minutes. Begin by powering off the printer and unplugging it. Open the front cover and remove the toner cartridge and drum unit to access the paper feed area. Locate the upper roller assembly—it sits above the feed tray, held in place by two plastic clips on each end.
Press the clips outward to release the roller shaft, then slide the roller out. The new roller should slide onto the shaft until it clicks into position. Ensure the roller rotates freely before reinstalling the drum and toner. After reassembly, run a few test prints to confirm proper feeding. If jams persist, check the lower roller and separation pad for wear.
Maintenance Tips to Extend Upper Roller Life
To maximize the life of your upper roller, use paper within the recommended weight range (60–120 gsm) and store it in a dry environment. Avoid refilling the tray with mixed paper types or sizes, as this can cause uneven wear. Clean the roller monthly with a lint-free cloth dampened with water (not alcohol, which can dry out the rubber).
If you experience repeated failures, inspect the paper path for debris or sharp edges that could damage the roller. Upgrading to a genuine Xerox roller rather than an aftermarket alternative often provides better consistency and durability. For high-volume environments, consider scheduling roller replacement during routine maintenance to avoid unplanned downtime.